用户及权限管理
一、实验介绍
1、关于本实验
本实验主要介绍Linux操作系统的用户和权限管理。
2、实验目的
掌握用户和组的管理;掌握文件权限的管理。
二、实验任务配置
1、配置步骤
(1)用户和用户组的管理
- 步骤1:
who命令用于显示目前登录系统的用户信息。
[root@localhost ~]# who
root     tty1         2022-12-28 12:26
root     pts/0        2022-12-28 15:13 (192.168.74.1)
[root@localhost ~]#
- 步骤2:
id命令用于显示用户的ID,以及所属群组的ID。
[root@localhost ~]# id
用户id=0(root) 组id=0(root) 组=0(root) 上下文=unconfined_u:unconfined_r:unconfined_t:s0-s0:c0.c1023
[root@localhost ~]#
- 步骤3:以
root用户登录系统,创建用户tom、bob、jack,创建jack用户时指定其UID为1024。
[root@localhost ~]# useradd tom
[root@localhost ~]# useradd bob
[root@localhost ~]# useradd -u 1024 jack
[root@localhost ~]# tail -3 /etc/passwd
tom:x:1000:1000::/home/tom:/bin/bash
bob:x:1001:1001::/home/bob:/bin/bash
jack:x:1024:1024::/home/jack:/bin/bash
[root@localhost ~]# useradd -d /home/myd bob1     #为新添加的用户指定home目录
[root@localhost ~]# useradd -d /usr/local/apache -g apache -s /bin/false bob2
#添加一个不能登录的用户;添加一个bob2用户,登录目录为/usr/local/apache,用户组为apache,指定shell为/bin/false;将用户 shell 设置为 /usr/sbin/nologin 或者 /bin/false,表示拒绝用户登录
[root@localhost ~]#
- 步骤4:将用户
tom的用户名改为tony,并将其家目录改为/home/tony。
[root@localhost ~]# usermod -l tony tom
[root@localhost ~]# cp -r /home/tom/ /home/tony/
[root@localhost ~]# cd /home/tony/
[root@localhost tony]# cd ~
[root@localhost ~]# usermod -d /home/tony/ tony
[root@localhost ~]# tail -3 /etc/passwd
bob1:x:1025:1025::/home/myd:/bin/bash
bob2:x:1026:48::/usr/local/apache:/bin/false
tony:x:1000:1000::/home/tony/:/bin/bash
[root@localhost ~]#
修改原tom用户的私有组名tom改为tony。
[root@localhost ~]# groupmod -n tony tom
[root@localhost ~]# tail -1 /etc/group
tony:x:1000:
[root@localhost ~]#
- 步骤5:将用户
bob及家目录一并删除。
[root@localhost ~]# userdel -r bob
[root@localhost ~]# tail -2 /etc/passwd
bob2:x:1026:48::/usr/local/apache:/bin/false
tony:x:1000:1000::/home/tony/:/bin/bash
[root@localhost ~]#
- 步骤6:
su切换用户 从当前root用户切换到jack用户。
[root@localhost ~] # su jack
Welcome to 4.19.90-2003.4.0.0036.oe1.x86_64
System information as of time:  2022 年 12 月 29日 星期四 12:14:31 CST
System load:    0.00
Processes:      159
Memory used:    19.3%
Swap used:      0.0%
Usage On:       9%
IP address:     192.168.74.138
Users online:   2
[jack@localhost root]$ pwd
/root
[jack@localhost root]$ exit
exit
[root@localhost ~] # su - jack
上一次登录:四 12 月 29 12:14:31 CST 2022pts/0 上
Welcome to 4.19.90-2003.4.0.0036.oe1.x86_64
System information as of time:  2022 年 12 月 29日 星期四 12:14:46 CST
System load:    0.00
Processes:      160
Memory used:    19.4%
Swap used:      0.0%
Usage On:       9%
IP address:     192.168.74.138
Users online:   2
[jack@localhost ~] $ pwd
/home/jack
[jack@localhost ~] $ exit
注销
[root@localhost ~] #
问题:请简述两种su命令切换用户有什么不同?
(2)用户账号的锁定操作
- 步骤1:分别给
tony账号和jack账号设置密码,密码设置为Huawei@123。
[root@localhost ~]# passwd tony
更改用户 tony 的密码 。
新的 密码:
重新输入新的 密码:
passwd:所有的身份验证令牌已经成功更新。
[root@localhost ~]#
- 步骤2:将
jack账号锁定,测试效果后再解锁。 查看jack账号当前的状态。
[root@localhost ~]# passwd -S jack
jack LK 2022-12-29 0 99999 7 -1 (密码已被锁定。)
[root@localhost ~]# passwd -l jack
锁定用户 jack 的密码 。
passwd: 操作成功
[root@localhost ~]# passwd -S jack
jack LK 2022-12-29 0 99999 7 -1 (密码已被锁定。)
[root@localhost ~]# passwd -uf jack     //openEuler在这里做了安全加强,必须加上-f强制解锁。其实不加也行。
解锁用户 jack 的密码。
passwd: 操作成功
[root@localhost ~]# passwd -S jack
jack NP 2022-12-29 0 99999 7 -1 (密码为空。)
[root@localhost ~]#
- 步骤3:
chage命令查看编辑密码过期时间 查看用户密码过期时间。
[root@localhost ~]# chage -l jack
最近一次密码修改时间                   :12月 29, 2022
密码过期时间                         :从不
密码失效时间                         :从不
帐户过期时间                         :从不
两次改变密码之间相距的最小天数          :0
两次改变密码之间相距的最大天数          :99999
在密码过期之前警告的天数        :7
[root@localhost ~]#
编辑用户密码过期时间,其它参数说明:
-m:密码可更改的最小天数。为零时代表任何时候都可以更改密码。-M:密码保持有效的最大天数。-W:用户密码到期前,提前收到警告信息的天数。-E:帐号到期的日期。过了这天,此帐号将不可用。-d:上一次更改的日期-I:停滞时期。如果一个密码已过期这些天,那么此帐号将不可用。-l:例出当前的设置。由非特权用户来确定他们的密码或帐号何时过期。
(3)用户组管理
- 步骤1:创建
hatest组,并将用户tony、jack加到hatest组里面。
[root@localhost ~]# groupadd hatest
[root@localhost ~]# gpasswd -M tony,jack hatest     # -M 设置组 GROUP 的成员列表
[root@localhost ~]# tail -1 /etc/group     #查看用户组是否创建成功
hatest:x:1026:tony,jack
[root@localhost ~]#
- 步骤2:删除,修改用户组
[root@localhost ~] # groupadd group1
[root@localhost ~] # groupadd -g 101 group2
[root@localhost ~] # groupdel group1     #删除用户组
[root@localhost ~] # groupmod -g 102 group2     #更改用户组ID
[root@localhost ~] # cat /etc/group     #查看用户组
root:x:0:
bin:x:1:
daemon:x:2:
sys:x:3:
adm:x:4:
tty:x:5:
disk:x:6:sanlock
lp:x:7:
mem:x:8:
kmem:x:9:
wheel:x:10:
cdrom:x:11:
mail:x:12:postfix
man:x:15:
dialout:x:18:
floppy:x:19:
games:x:20:
tape:x:33:
video:x:39:
ftp:x:50:
lock:x:54:
audio:x:63:
users:x:100:
nobody:x:65534:
utmp:x:22:
input:x:999:
kvm:x:36:qemu
render:x:998:
systemd-journal:x:190:
systemd-coredump:x:997:
systemd-network:x:192:
systemd-resolve:x:193:
ssh_keys:x:996:
sshd:x:74:
systemd-timesync:x:995:
unbound:x:994:
tss:x:59:
polkitd:x:993:
saslauth:x:76:
rpc:x:32:
printadmin:x:992:
libstoragemgmt:x:991:
apache:x:48:
stapusr:x:156:
stapsys:x:157:
stapdev:x:158:
pcp:x:990:
brlapi:x:989:
dnsmasq:x:988:
cgred:x:987:
libvirt:x:986:
radvd:x:75:
sanlock:x:179:
dhcpd:x:177:
rpcuser:x:29:
qemu:x:107:
named:x:25:
gluster:x:985:
setroubleshoot:x:984:
geoclue:x:983:
cockpit-ws:x:982:
pegasus:x:65:
chrony:x:981:
pcpqa:x:980:
pesign:x:979:
postdrop:x:90:
postfix:x:89:
slocate:x:21:
tcpdump:x:72:
dbus:x:978:
jack:x:1024:
bob1:x:1025:
tony:x:1000:
hatest:x:1026:tony,jack
group2:x:102:
[root@localhost ~] #
(4)手工及批量创建账号
- 步骤1:编辑一个文本用户文件,每一列按照
/etc/passwd密码文件的格式书写,注意每个用户的用户名、UID、宿主目录都不可以相同,密码栏可留空白或输入x号。
[root@localhost ~]# vim users.txt
user1:x:1200:1200:user001:/home/user1:/bin/bash
user2:x:1201:1201:user002:/home/user2:/bin/bash
user3:x:1202:1202:user003:/home/user3:/bin/bash
- 步骤2:以
root身份执行命令newusers,从刚创建的用户文件user.txt中导入数据,创建用户。
[root@localhost ~]# newusers < users.txt
[root@localhost ~]# tail -3 /etc/passwd
user1:x:1200:1200:user001:/home/user1:/bin/bash
user2:x:1201:1201:user002:/home/user2:/bin/bash
user3:x:1202:1202:user003:/home/user3:/bin/bash
(5)查看常见用户关联文件
- 步骤1:查看用户账号信息文件:
/etc/passwd
[root@localhost ~] # cat /etc/passwd
root:x:0:0:root:/root:/bin/bash
bin:x:1:1:bin:/bin:/sbin/nologin
daemon:x:2:2:daemon:/sbin:/sbin/nologin
adm:x:3:4:adm:/var/adm:/sbin/nologin
lp:x:4:7:lp:/var/spool/lpd:/sbin/nologin
sync:x:5:0:sync:/sbin:/bin/sync
shutdown:x:6:0:shutdown:/sbin:/sbin/shutdown
halt:x:7:0:halt:/sbin:/sbin/halt
mail:x:8:12:mail:/var/spool/mail:/sbin/nologin
operator:x:11:0:operator:/root:/sbin/nologin
games:x:12:100:games:/usr/games:/sbin/nologin
ftp:x:14:50:FTP User:/var/ftp:/sbin/nologin
nobody:x:65534:65534:Kernel Overflow User:/:/sbin/nologin
systemd-coredump:x:999:997:systemd Core Dumper:/:/sbin/nologin
systemd-network:x:192:192:systemd Network Management:/:/sbin/nologin
systemd-resolve:x:193:193:systemd Resolver:/:/sbin/nologin
sshd:x:74:74:Privilege-separated SSH:/var/empty/sshd:/sbin/nologin
systemd-timesync:x:998:995:systemd Time Synchronization:/:/sbin/nologin
unbound:x:997:994:Unbound DNS resolver:/etc/unbound:/sbin/nologin
tss:x:59:59:Account used by the trousers package to sandbox the tcsd daemon:/dev/null:/sbin/nologin
polkitd:x:996:993:User for polkitd:/:/sbin/nologin
saslauth:x:995:76:Saslauthd user:/run/saslauthd:/sbin/nologin
rpc:x:32:32:Rpcbind Daemon:/var/lib/rpcbind:/sbin/nologin
libstoragemgmt:x:994:991:daemon account for libstoragemgmt:/var/run/lsm:/sbin/nologin
apache:x:48:48:Apache:/usr/share/httpd:/sbin/nologin
pcp:x:993:990:PCP:/var/lib/pcp:/sbin/nologin
dnsmasq:x:988:988:Dnsmasq DHCP and DNS server:/var/lib/dnsmasq:/usr/sbin/nologin
radvd:x:75:75:radvd user:/:/sbin/nologin
sanlock:x:179:179:sanlock:/var/run/sanlock:/sbin/nologin
dhcpd:x:177:177:DHCP server:/:/sbin/nologin
rpcuser:x:29:29:RPC Service User:/var/lib/nfs:/sbin/nologin
qemu:x:107:107:qemu user:/:/sbin/nolog
- 步骤2:查看用户账号信息加密文件
/etc/shadow
[root@localhost ~] # cat /etc/shadow
root:$6$tkamNBR3x3v2RMGj$jlkFK6WQTEL4JJe88lSJWysquOmOcvwmL98I0p8bK5lXgTf/JBwUGfkLeFuATvuPukCfIF1/cO6i0Yi/mjvNS/:19354:0:99999:7:::
bin:*:18344:0:99999:7:::
daemon:*:18344:0:99999:7:::
adm:*:18344:0:99999:7:::
lp:*:18344:0:99999:7:::
sync:*:18344:0:99999:7:::
shutdown:*:18344:0:99999:7:::
halt:*:18344:0:99999:7:::
mail:*:18344:0:99999:7:::
operator:*:18344:0:99999:7:::
games:*:18344:0:99999:7:::
ftp:*:18344:0:99999:7:::
nobody:*:18344:0:99999:7:::
systemd-coredump:!:19354::::::
systemd-network:!:19354::::::
systemd-resolve:!:19354::::::
sshd:!:19354::::::
systemd-timesync:!:19354::::::
unbound:!:19354::::::
tss:!:19354::::::
polkitd:!:19354::::::
saslauth:!:19354::::::
rpc:!:19354:0:99999:7:::
libstoragemgmt:!:19354::::::
apache:!:19354::::::
pcp:!:19354::::::
dnsmasq:!!:19354:::::1:
radvd:!:19354::::::
sanlock:!:19354::::::
dhcpd:!:19354::::::
rpcuser:!:19354::::::
qemu:!:19354::::::
named:!:19354::::::
gluster:!:19354::::::
setroubleshoot:!:19354::::::
geoclue:!:19354::::::
cockpit-ws:!:19354::::::
pegasus:!:19354::::::
chrony:!:19354::::::
pcpqa:!:19354::::::
pesign:!:19354::::::
postfix:!:19354::::::
tcpdump:!:19354::::::
dbus:!!:19354:::::1:
jack::19355:0:99999:7:::
bob1:!:19355:0:99999:7:::
bob2:!:19355:0:99999:7:::
tony:$6$NCvzz/9J5i7QC5gI$z/x8e7mklHOE.3saKrEsrXk.bbJV5CB.5SGKyuUa2m9yp6nTgBLCrj6w0tje1ERUxEiC.b9l4fUiT2bIyCloD1:19355:0:99999:7:::
user1:$6$xr6d91EYL6/D1b8m$EBk1mMfQ1ZhDh8MlTLoEvSahf/WznUp1HOX97ew2cnP0lRf2ZpRQ3rSSj4KtyrbmMejBgnI8HfGs37rCVqSW5.:19355:0:99999:7:::
user2:$6$tTBvnRUYkkVMf$w.C90vDoUzHpSYJ8zj2Tgh2Yr2ChyrCt0z/VbxjKLeugsyUcLsZY1/pBJKjOIbuA5NukDfI6JGCvWYr7RfKAQ1:19355:0:99999:7:::
user3:$6$tTBvnRUYkkVMf$w.C90vDoUzHpSYJ8zj2Tgh2Yr2ChyrCt0z/VbxjKLeugsyUcLsZY1/pBJKjOIbuA5NukDfI6JGCvWYr7RfKAQ1:19355:0:99999:7:::
[root@localhost ~] #
- 步骤3:查看组信息文件
/etc/group
[root@localhost ~] # cat /etc/group
root:x:0:
bin:x:1:
daemon:x:2:
sys:x:3:
adm:x:4:
tty:x:5:
disk:x:6:sanlock
lp:x:7:
mem:x:8:
kmem:x:9:
wheel:x:10:
cdrom:x:11:
mail:x:12:postfix
man:x:15:
dialout:x:18:
floppy:x:19:
games:x:20:
tape:x:33:
video:x:39:
ftp:x:50:
lock:x:54:
audio:x:63:
users:x:100:
nobody:x:65534:
utmp:x:22:
input:x:999:
kvm:x:36:qemu
render:x:998:
systemd-journal:x:190:
systemd-coredump:x:997:
systemd-network:x:192:
systemd-resolve:x:193:
ssh_keys:x:996:
sshd:x:74:
systemd-timesync:x:995:
unbound:x:994:
tss:x:59:
polkitd:x:993:
saslauth:x:76:
rpc:x:32:
printadmin:x:992:
libstoragemgmt:x:991:
apache:x:48:
stapusr:x:156:
stapsys:x:157:
stapdev:x:158:
pcp:x:990:
brlapi:x:989:
dnsmasq:x:988:
cgred:x:987:
libvirt:x:986:
radvd:x:75:
sanlock:x:179:
dhcpd:x:177:
rpcuser:x:29:
qemu:x:107:
named:x:25:
gluster:x:985:
setroubleshoot:x:984:
geoclue:x:983:
cockpit-ws:x:982:
pegasus:x:65:
chrony:x:981:
pcpqa:x:980:
pesign:x:979:
postdrop:x:90:
postfix:x:89:
slocate:x:21:
tcpdump:x:72:
dbus:x:978:
jack:x:1024:
bob1:x:1025:
tony:x:1000:
hatest:x:1026:tony,jack
group2:x:102:
user1:x:1200:
user2:x:1201:
user3:x:1202:
[root@localhost ~] #
- 步骤4:查看组信息加密文件
/etc/gshadow
[root@localhost ~] # cat /etc/gshadow
root:::
bin:::
daemon:::
sys:::
adm:::
tty:::
disk:::sanlock
lp:::
mem:::
kmem:::
wheel:::
cdrom:::
mail:::postfix
man:::
dialout:::
floppy:::
games:::
tape:::
video:::
ftp:::
lock:::
audio:::
users:::
nobody:::
utmp:!::
input:!::
kvm:!::qemu
render:!::
systemd-journal:!::
systemd-coredump:!::
systemd-network:!::
systemd-resolve:!::
ssh_keys:!::
sshd:!::
systemd-timesync:!::
unbound:!::
tss:!::
polkitd:!::
saslauth:!::
rpc:!::
printadmin:!::
libstoragemgmt:!::
apache:!::
stapusr:!::
stapsys:!::
stapdev:!::
pcp:!::
brlapi:!::
dnsmasq:!!::
cgred:!::
libvirt:!::
radvd:!::
sanlock:!::
dhcpd:!::
rpcuser:!::
qemu:!::
named:!::
gluster:!::
setroubleshoot:!::
geoclue:!::
cockpit-ws:!::
pegasus:!::
chrony:!::
pcpqa:!::
pesign:!::
postdrop:!::
postfix:!::
slocate:!::
tcpdump:!::
dbus:!!::
jack:!::
bob1:!::
tony:!::
hatest:!::tony,jack
group2:!::
user1:*::
user2:*::
user3:*::
[root@localhost ~] #
(6)设置文件及目录的权限及归属
- 步骤1:使用
root用户创建目录/test以及在其下创建文件file1、file2,并查看其默认的权限及归属
[root@localhost ~]# mkdir test
[root@localhost ~]# cd /root/test
[root@localhost test]# touch file1
[root@localhost test]# touch file2
[root@localhost test]# ll
总用量 0
-rw-------. 1 root root 0 12月 29 14:08 file1
-rw-------. 1 root root 0 12月 29 14:08 file2
[root@localhost test]# ls -l /root | grep test
drwx------. 2 root root  4096 12月 29 14:08 test
[root@localhost test]#
- 步骤2:将
/root/test目录修改为公共共享目录即给其设置t权限位。t权限位意味着该目录中的文件只有属主属组才可以删除,即使某个属组用户具有和属主同等的权限,也删除不了。
[root@localhost test]# cd
[root@localhost ~]# chmod 1777  test
[root@localhost ~]# ls -l /root | grep test
drwxrwxrwt. 2 root root  4096 12月 29 14:08 test
[root@localhost ~]# chmod 755 /root/test/file1 /root/test/file2
[root@localhost ~]# ll test
总用量 0
-rwxr-xr-x. 1 root root 0 12月 29 14:08 file1
-rwxr-xr-x. 1 root root 0 12月 29 14:08 file2
[root@localhost ~]#
- 步骤3:将文件
file1设为所有人皆可读取
[root@localhost ~]# cd test/
[root@localhost test]# chmod ugo+r file1
[root@localhost test]#
- 步骤4:将文件
file1设为所有人皆可读取
[root@localhost test]# chmod a+r file1
[root@localhost test]#
- 步骤5:将文件
file1与file2设为该文件拥有者,与其所属同一个群体者可写入,但其他以外的人则不可写入
[root@localhost test]# chmod ug+w,o-w file1 file2
[root@localhost test]#
- 步骤6:将目前目录下的所有文件与子目录皆设为任何人可读取
[root@localhost test]# chmod -R a+r *
[root@localhost test]#
- 步骤7:将文件
file1的所属用户改为jack,所属用户组改为hatest组
[root@localhost ~]# chown jack:hatest test/file1
[root@localhost ~]# ll test/
总用量 0
-rwxrwxr-x. 1 jack hatest 0 12月 29 14:08 file1
-rwxrwxr-x. 1 root root   0 12月 29 14:08 file2
- 步骤8:修改文件群组属性
[root@localhost test]# chgrp -v bin file1
'file1' 的所属组已从 hatest 更改为 bin
[root@localhost test]# ll
总用量 0
-rwxrwxr-x. 1 jack bin  0 12月 29 14:08 file1
-rwxrwxr-x. 1 root root 0 12月 29 14:08 file2
[root@localhost test]#
- 步骤9:通过
umask查看修改权限掩码前的umask值
[root@localhost test]# umask
0077
[root@localhost test]#
- 步骤10:使用
umask命令进行权限的修改
[root@localhost test]# umask 022
[root@localhost test]# umask
0022
[root@localhost test]#
(7)ACL的设置
- 步骤1:先使得文件
file1的所属组对其有写入权限
[root@localhost ~]# chmod 775 test/file1
[root@localhost ~]# ls -l test | grep file1
-rwxrwxr-x. 1 jack bin  0 12月 29 14:08 file1
[root@localhost ~]#
- 步骤2:配置文件ACL使得
hatest组中tony用户对文件file1只有只读权限
[root@localhost ~]# getfacl test/file1
# file: test/file1
# owner: jack
# group: bin
user::rwx
group::rwx
other::r-x

[root@localhost ~]# setfacl -m u:tony:r test/file1
[root@localhost ~]# getfacl test/file1
# file: test/file1
# owner: jack
# group: bin
user::rwx
user:tony:r--
group::rwx
mask::rwx
other::r-x
- 步骤3:切换到
tony用户下测试是否能写入file1文件 注意:这里为了测试起冲突,取消掉/test目录的t位
[root@localhost ~] # su - tony
上一次登录:四 12 月 29 14:32:34 CST 2022pts/0 上
su: 警告:无法更改到 /home/tony/ 目录: 权限不够

Welcome to 4.19.90-2003.4.0.0036.oe1.x86_64
System information as of time:  2022 年 12 月 29日 星期四 14:33:37 CST
System load:    0.00
Processes:      158
Memory used:    19.5%
Swap used:      0.0%
Usage On:       9%
IP address:     192.168.74.138
Users online:   2

-bash: /home/tony//.bash_profile: 权限不够
[tony@localhost root]$ exit
注销
-bash: /home/tony//.bash_logout: 权限不够
查看tony用户情况:
[root@localhost ~]# id tony
用户id=1000(tony) 组id=1000(tony) 组=1000(tony),1026(hatest)
[root@localhost ~]#
查看目录权限:
[root@localhost ~]# ls -ld /home/tony
drwx------. 2 root root 4096 12月 29 12:08 /home/tony
[root@localhost ~]#
给777权限:
[root@localhost ~]# chmod 777 /home/tony
[root@localhost ~]#
然后正常切换:
[root@localhost /] # su - tony
上一次登录:四 12 月 29 14:37:30 CST 2022pts/0 上
Welcome to 4.19.90-2003.4.0.0036.oe1.x86_64
System information as of time: 2022 年 12 月 29日 星期四 14:38:52 CST
System load: 0.00
Processes: 157
Memory used: 19.6%
Swap used: 0.0%
Usage On: 9%
IP address: 192.168.74.138
Users online: 2
-bash: /home/tony//.bash_profile: 权限不够
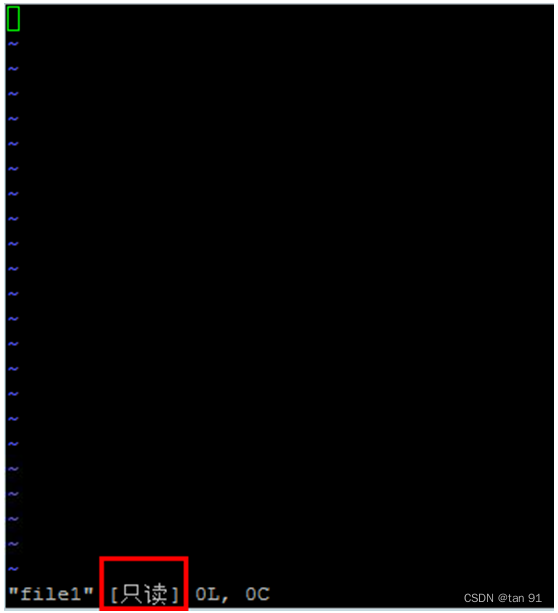
[tony@localhost ~] $ cd /test/
[tony@localhost test]$ vim file1
# "file1" [只读]0L,0C
# 发现文件是只读的,无法写入
- 步骤4:清除文件名为
file1的文件上的ACL设置
[root@localhost test]# getfacl -e file1
# file: file1
# owner: root
# group: bin

user::rwx
user:tony:r--                   #effective:r--

group::rwx                      #effective:rwx

mask::rwx
other::r-x
[root@localhost test]# chacl -B file1
[root@localhost test]# getfacl -e file1
# file: file1
# owner: root
# group: bin

user::rwx
group::rwx
other::r-x
[root@localhost test]#